Any individual who kayaks will reveal to you that knowing how to transport their kayak on their next excursion is a need.
The vast majority of people don’t live in sufficiently close to a waterway to have the advantage of having the capacity to walk their kayak down to the water directly. Along these lines, most of the cars manufactured today are more than very much prepared for conveying our kayaks, on account of capacity racks you can discover on the rooftop.
Step 1 – Lay Out The Straps
The principal thing you should do is snare the kayak lashes onto the front and back crossbars appended to your rooftop rack. To do this, you should pass one end of each kayak lash around the base of each crossbar.
Boat straps or Kayak have an end that contains a clasp and an end without a clasp. When playing out this progression, we prescribe you pass the end without the clasp around a crossbar base.
While doing this, hold the end with the lock in your other hand, so it doesn’t scratch the paint on your car, or more awful, break a window. When you get the kayak tie circled around, let the two closures of the tie lean tenderly against the auto and proceed onward to the second lash.
When you have safely wrapped the kayak lashes around the crossbars, you can proceed onward to the subsequent stage.
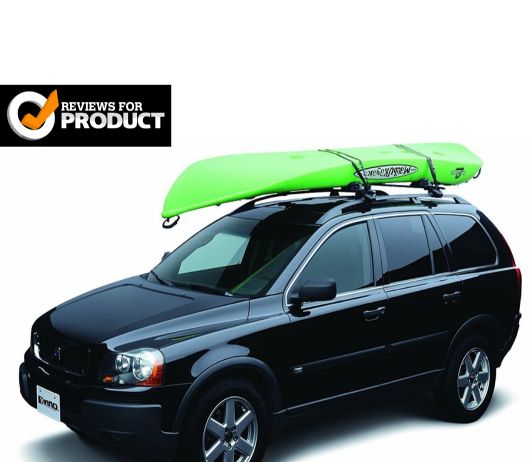
Step 2 – Place a Kayak on Car’s Roof Rack Crossbars
For this subsequent stage, you will need to practice a tad of alert and cautious taking care of as not to harm your kayak or car.
It’s imperative to take note of that before you put your kayak on the crossbars of your rooftop rack; you might need to cushion them with froth or another kind of padding where the kayak will rest.
Doing this will help guarantee that you don’t harm your kayak on the off chance that it bobs or slides at all as and when you are transporting it.
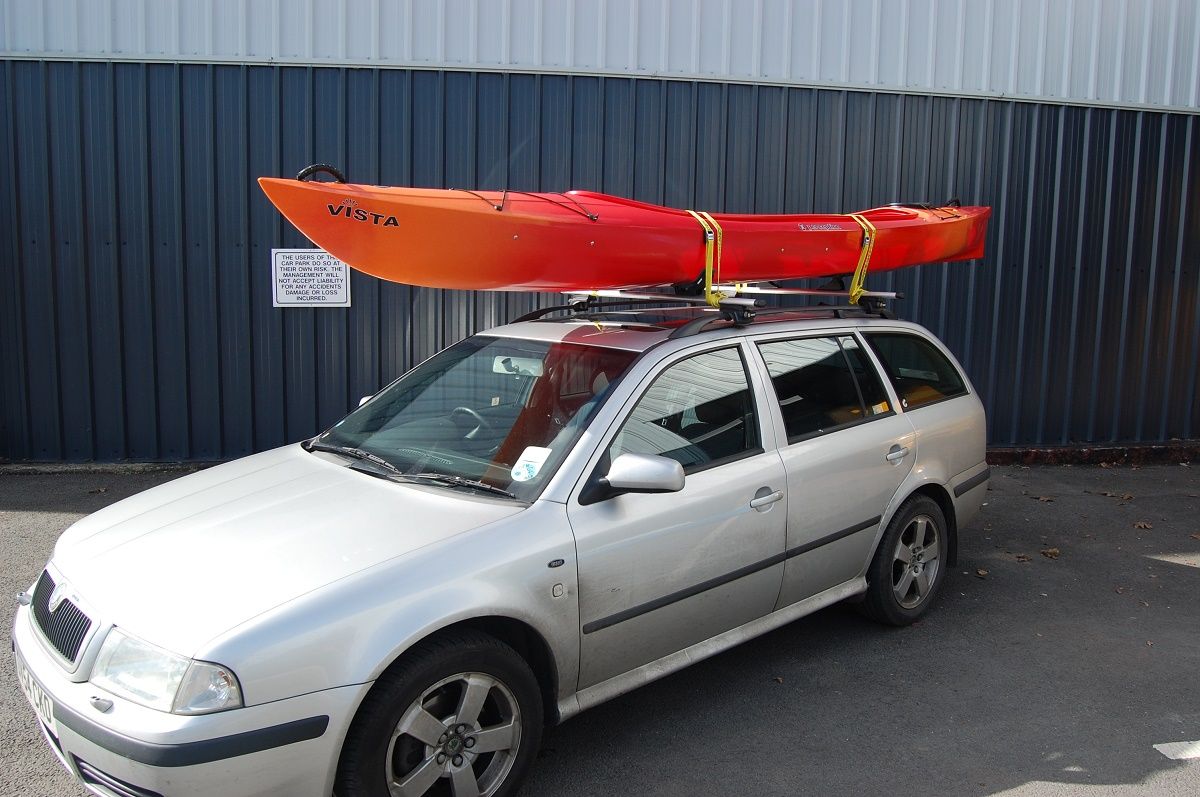
Step 3 – Lay the Straps across the Kayak
Next, you will lay the ties over the structure of the kayak. Take the tie end without the clasp and toss it over the highest point of the kayak to the opposed side of your vehicle. Do this for the two ties.
For the clasp end of the ties, you will most likely need to just walk them around to the contrary side of your vehicle.
You wouldn’t have any desire to toss this end part of the kayak tie and ding up your paintwork. Ensure you don’t have any turns or different crimps in the ties previously you continue to the subsequent stage.
Step 4 – Tighten The Straps
This last advance is the hardest because you need to be extremely watchful. Now, you ought to have the two tie ends swinging from the kayak’s hull. You will need the clasp end of each lash to be someplace near the focal point of a side of a kayak as it will give more useful to work with when we begin fixing it down.
When you have set your kayak buckles to settle generally where you require them, take the opposite end of the lash and pass it underneath the crossbar and up through the clasp. Try to either tie off whatever is left of the tie or tuck it into your entryway, so it isn’t fluttering in the breeze as you drive.
What’s more, there you go; your kayak is presently legitimately and securely lashed to your rooftop rack.